 In this tutorial you will learn how to create a beautiful sunset over a
calm sea using DreamScape and 3dsmax. DreamScape is sophisticated set of
plug-ins for 3dsmax, that allows you to create and render realistic
landscapes, seascapes, skies, clouds, outdoor lighting and more.
In this tutorial you will learn how to create a beautiful sunset over a
calm sea using DreamScape and 3dsmax. DreamScape is sophisticated set of
plug-ins for 3dsmax, that allows you to create and render realistic
landscapes, seascapes, skies, clouds, outdoor lighting and more.
Step 1
First of all, to render a scene with DreamScape, you will need to
create a special light called "Sun”. In the "Create” panel, click the
"Lights” icon, then from the dropdown menu, select "DreamScape”, and add
a "Sun” light in the viewport.
Step 2
Move this light to the coordinates: x = 1700, y = 11000, and z = 800.
Step 3
Create a free camera, and move it to the coordinates: x = 0, y = 0,
and z = 100. Rotate the camera by ‘87′ degrees on the ‘x’ axis.
Step 4
Next, you will create the sun and the clouds. Press the ‘8′ key on
the keyboard, to open the "Environment” panel. In the "Atmosphere”
rollout, click the "Add” button and choose "DreamScape”.
Step 5
In the "General Parameters” rollout, click the "Preview” button to
open the "DreamScape Sky Preview” window. This tool allows you to
quickly review your sky settings in realtime.
Step 6
In the "Atmosphere Parameters” rollout, change the "Sky Density” to
‘5′, the "Glow” value to ‘4′, and the "H Scale” to ‘5000′.
Step 7
After that, change the "Haze Density” to ‘2′, the "H Scale” to ‘200′,
and the "Brightness” value to ‘2′.
Step 8
In the "Clouds Parameters” rollout, change the "Clouds Type” to
"Cirrus”. Under the "Shape” group, change the "Detail” value to ‘16′,
the "Scale” to ‘0.25′, the "Coverage” value to ‘0.8′ and the "Sharpness”
value to ‘0.5′.
Step 9
If you want to move the clouds around, you can do it in the
"DreamScape Sky Preview” window. Click in the "Clouds Shape Preview”,
and holding the left mouse button, move the clouds and see the result in
realtime. This affects the "Motion Offset” ‘x’ and ‘y’ parameters.
Step 10
Render the scene. If you want another result, you can play with all
these settings until you get something you like.
Step 11
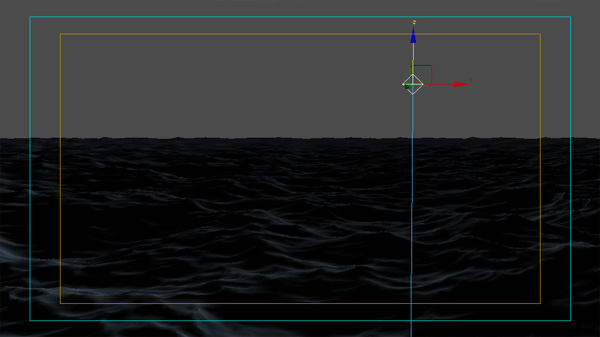
Next you will create the sea surface. Go to the "Create” panel, click
the "Geometry” icon, and from the dropdown menu, select "DreamScape
Objects”, and add a "Sea Surface” in the viewport.
Step 12
Under the "Parameters” rollout, change the "Surface Type” to
"Adaptive Mesh”. This allows you to create a sea surface relative to
your camera position and field of view (the sea surface that is nearest
to the camera will be more detailed than the surface that is further
away).
Step 13
Change the "Surface Width” to ‘400′ and the "Surface Length” to
‘10000′.
Step 14
Under the "Adaptive Mesh” rollout, click the "Pick Camera” icon, and
select the camera in the viewport.
Step 15
Under the "Waves” rollout, change the "Height Scale” to ‘0.7′ and the
"Choppy Waves” value to ‘1.3′.
Step 16
Open the "Material Editor”, click the "Get Material” icon, and select
"DreamScape: SeaMaterial” in the "Material Browser”.
Step 17
In the "Material Editor”, under the "DreamScape: SeaMaterial
Parameters” rollout, set the "Sharpness” value to ‘10′, change the "Sky
Color Type” to "DreamScape Sky”, and the "Underwater Color Type” to
"DreamScape SubSurface”.
Step 18
In the "Bump Map” slot, add a "DreamScape: Sea Bump” map to add more
details to the waves. Assign this material to the "Sea Surface”.
Step 19
Finally, in the "Time Configuration” panel, set the "FPS” to ‘25′ .
Turn on "Auto Key”, and animate the "Sun” on the ‘z’ axis, from ‘800′ at
frame ‘0′ to ‘600′ at frame ‘100′. That’s all, you can now render the
animation.
Final Effect
Below you can see my final results. I hope you enjoyed this intro to
Dreamscape in 3ds Max!


 %) seabump/seamateril does'nt work on my pc! help pleeeeeease


