| Calendar |
| « March 2026 » |
| Su |
Mo |
Tu |
We |
Th |
Fr |
Sa |
| 1 | 2 | 3 | 4 | 5 | 6 | 7 | | 8 | 9 | 10 | 11 | 12 | 13 | 14 | | 15 | 16 | 17 | 18 | 19 | 20 | 21 | | 22 | 23 | 24 | 25 | 26 | 27 | 28 | | 29 | 30 | 31 | |
| Friends Site |
Код нашей кнопки:
Code of our button:
|
| NEWS PARTNERS |

|
|
Archive
Home » Tutorials
QuadSpinner is offering you the chance to learn deeper aspects of creating scenes in Vue with renowned artist and trainer Dax Pandhi. This Master Class focuses on the Emerald EcoSystem because this visual subject is what people often avoid in Vue.
|
Covered 3D Creature Development in Zbrush Maya Photoshop and After Effects
1280x720 | 11 hrs | 3.4 GB | mp4
Genre: eLearning 3D Creature Development is a creative process that evolves a design by taking advantage of modern 3D tools and techniques. This Master Class introduces the student Photoshop, Maya, Mental Ray, UVLayout, ZBrush, BodyPaint, SynthEyes, After Effects. to the entire pipeline, while exploring form, looks and behavior. Along the way we focus on the experience of working on a project where our work must regularly be presented to an art director or client, while also keeping in mind that the workflow should allow for an iterative approach.
|
Digital_Tutors : Rigging Game Characters in Maya 2011
English | VP6F 782x646 | MP3 96 Kbps | 3.30 GB
Genre: eLearning In this collection of lessons we will learn about a wide variety of useful techniques for rigging game characters. In this course, we will rig a character for a game in Maya. We will cover techniques like setting up our joints to have a consistent orientation throughout the entire skeleton, we will build a twist rig to fix deformations that collapse in animation, we will learn how to create a foot rig with more banking control, and even cover creating a robust and flexible spine rig with advanced twisting. We will also discuss weight painting techniques that help to speed up that process, making it less intimidating and instead more of an enjoyable experience. By the end of this course you will learn rigging techniques that can be applied to any rig you build.
|
This series introduces the essential techniques for creating digital sets and backgrounds, an area of visual effects growing in prominence. In this first disc of a series of three, visual effects designer Eric Hanson reviews architectural design principles then leads into setting up a scene with a tracked camera and live-action plate. Next, Eric illustrates efficient set modeling techniques using both NURBS and polygons. Finally, the lesson provides a broad review of camerawork, from motion control to camera projection. Throughout the disc, Eric uses a sample scene of an urban environment to highlight all essential steps. The lecture is designed for all advancing intermediate Maya artists.
|
In this series of lessons we will be exploring many of the new and enhanced rendering features found in ZBrush 4. When creating digital sculptures in ZBrush, the rendering and presentation of that artwork is a very important aspect to consider. With the new rendering features that have been added in ZBrush 4, we can create renders that are much higher in quality and realism without ever having to leave ZBrush. This course will cover topics such as ambient occlusion rendering, adding subsurface scattering effects to our ZBrush models, rendering transparent refractive surfaces, rendering our ZBrush artwork into multiple passes for compositing purposes, as well as many other tips and techniques that will teach you not just how these features work, but how to use them properly to get the best results.
|
Starting with a photographic backplate and 3D model, Brendan McCaffrey presents an in-depth look at an automotive illustration project step-by-step from wire-frame to finished product, using Maya, Mental Ray and Photoshop®. In phase one, Brendan covers the initial brief, 3D setup and rendering. He then moves on to the view setup, matching the camera, and preparing the model and textures as they relate to high resolution work: shaders for paint, glass, metal and rubber. Brendan proceeds with the environment and lighting setup and on to the final renders of all the required layers and passes. In phase two, he assembles and corrects the render layers and passes in Photoshop®. Brendan then moves on to blending the image into a cohesive whole using non-destructive color correction and adjustment. Finally, he demonstrates how to apply effects and finishing touches. This DVD comes with the project's Photoshop files.
|
BEHIND THE SCENES (BTS) is a new and exciting DVD series developed to showcase the creation of a game cinematic sequence. The series follows a team of artists as they demonstrate their production techniques from concept phase to final rendered animation. This chapter in the series focuses on the vehicle featured in the cinematic, a futuristic helicopter designed by renowned Art Director Mark Goerner. Instructor Paul Schoeni takes the viewer step-by-step through the 3D modeling process in Maya, from simple proxy to final model. The viewer also gets to go behind the scenes and witness actual production meetings that discuss the design and creation of the helicopter.
|
In this DVD Jay Hawkins works from start to finish on the design for a Gears of War creature called the Locust Hydra. Jay covers everything from the intial thumbnail sketch to the final rendering of the concept used for production. He explains his design process using a combination of Adobe® Photoshop® and Autodesk® 3ds Max®. Jay also delves into his experiences in the game industry and at Epic Games, discussing what it takes to be a successful concept artist in today's ever changing and highly competitive market, and emphasizing the importance of teamwork for developing a successful game.
|
On this DVD, Matt focuses on the fundamental implementation and functionality of Mental Ray from within Maya. He covers many areas, beginning with an in-depth exploration of the interface of Mental Ray, including the use of MEL scripts to access custom features. Next, he shows an initial scene setup using a custom naming script to label files automatically and correctly as they are output. Many other topics are covered in depth, including setting up basic frame buffers, using diagnostics to debug your scenes, various implementations of motion blur including the rasterizer (rapid motion), lens shaders, a custom shader allowing you to blur in post, depth of field, displacement utilizing the latest techniques, including a thorough explanation of ccmeshes (Catmull-Clark meshes) and how to access them from within Mental Ray for Maya.
|
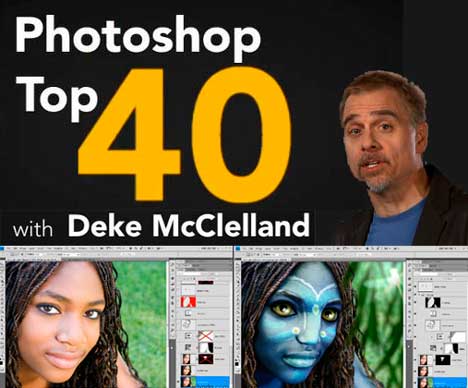
 There’s nothing people love more than lists, and Photoshop Top 40 offers a great one, highlighting the best features in Photoshop. Deke McClelland counts down to #1 to #40 with a new video each week, detailing one great feature after another in this popular digital imaging application. The videos cover tools, commands, and concepts, emphasizing what’s really important in Photoshop. |
|
|
| Statistics |
Total online: 1 Guests: 1 Users: 0
|
|


